
How to Photograph Snowflakes | A Beginner's Guide

snowflake photography
This post contains affiliate links. Please read my disclosure for more info.

I look forward to photographing snowflakes every winter. These tiny works of art go unnoticed by so many, but today I'm going to give you some tips to see them and photograph them in a whole new light. I think you will only be please with your efforts, and come away saying, "Amazing!" My kiddos and I did a study on them earlier this season. You can read that here. There is so much to learn from taking a closer look at these beauties. Friends, you'll be happy to know that you don't need crazy expensive equipment. It is not necessary to spend hundreds of dollars on a fancy macro lens. Now, if you R E A L L Y get into this (which may very well happen) you might want to start saving up ;) But for now, all you need is an attachment like this for your phone. Ready to learn? Here’s my beginner’s guide on how to photograph snowflakes!
Tips For Photographing Snowflakes
Tip 1: Study the Snow

life lessons from a snowflake
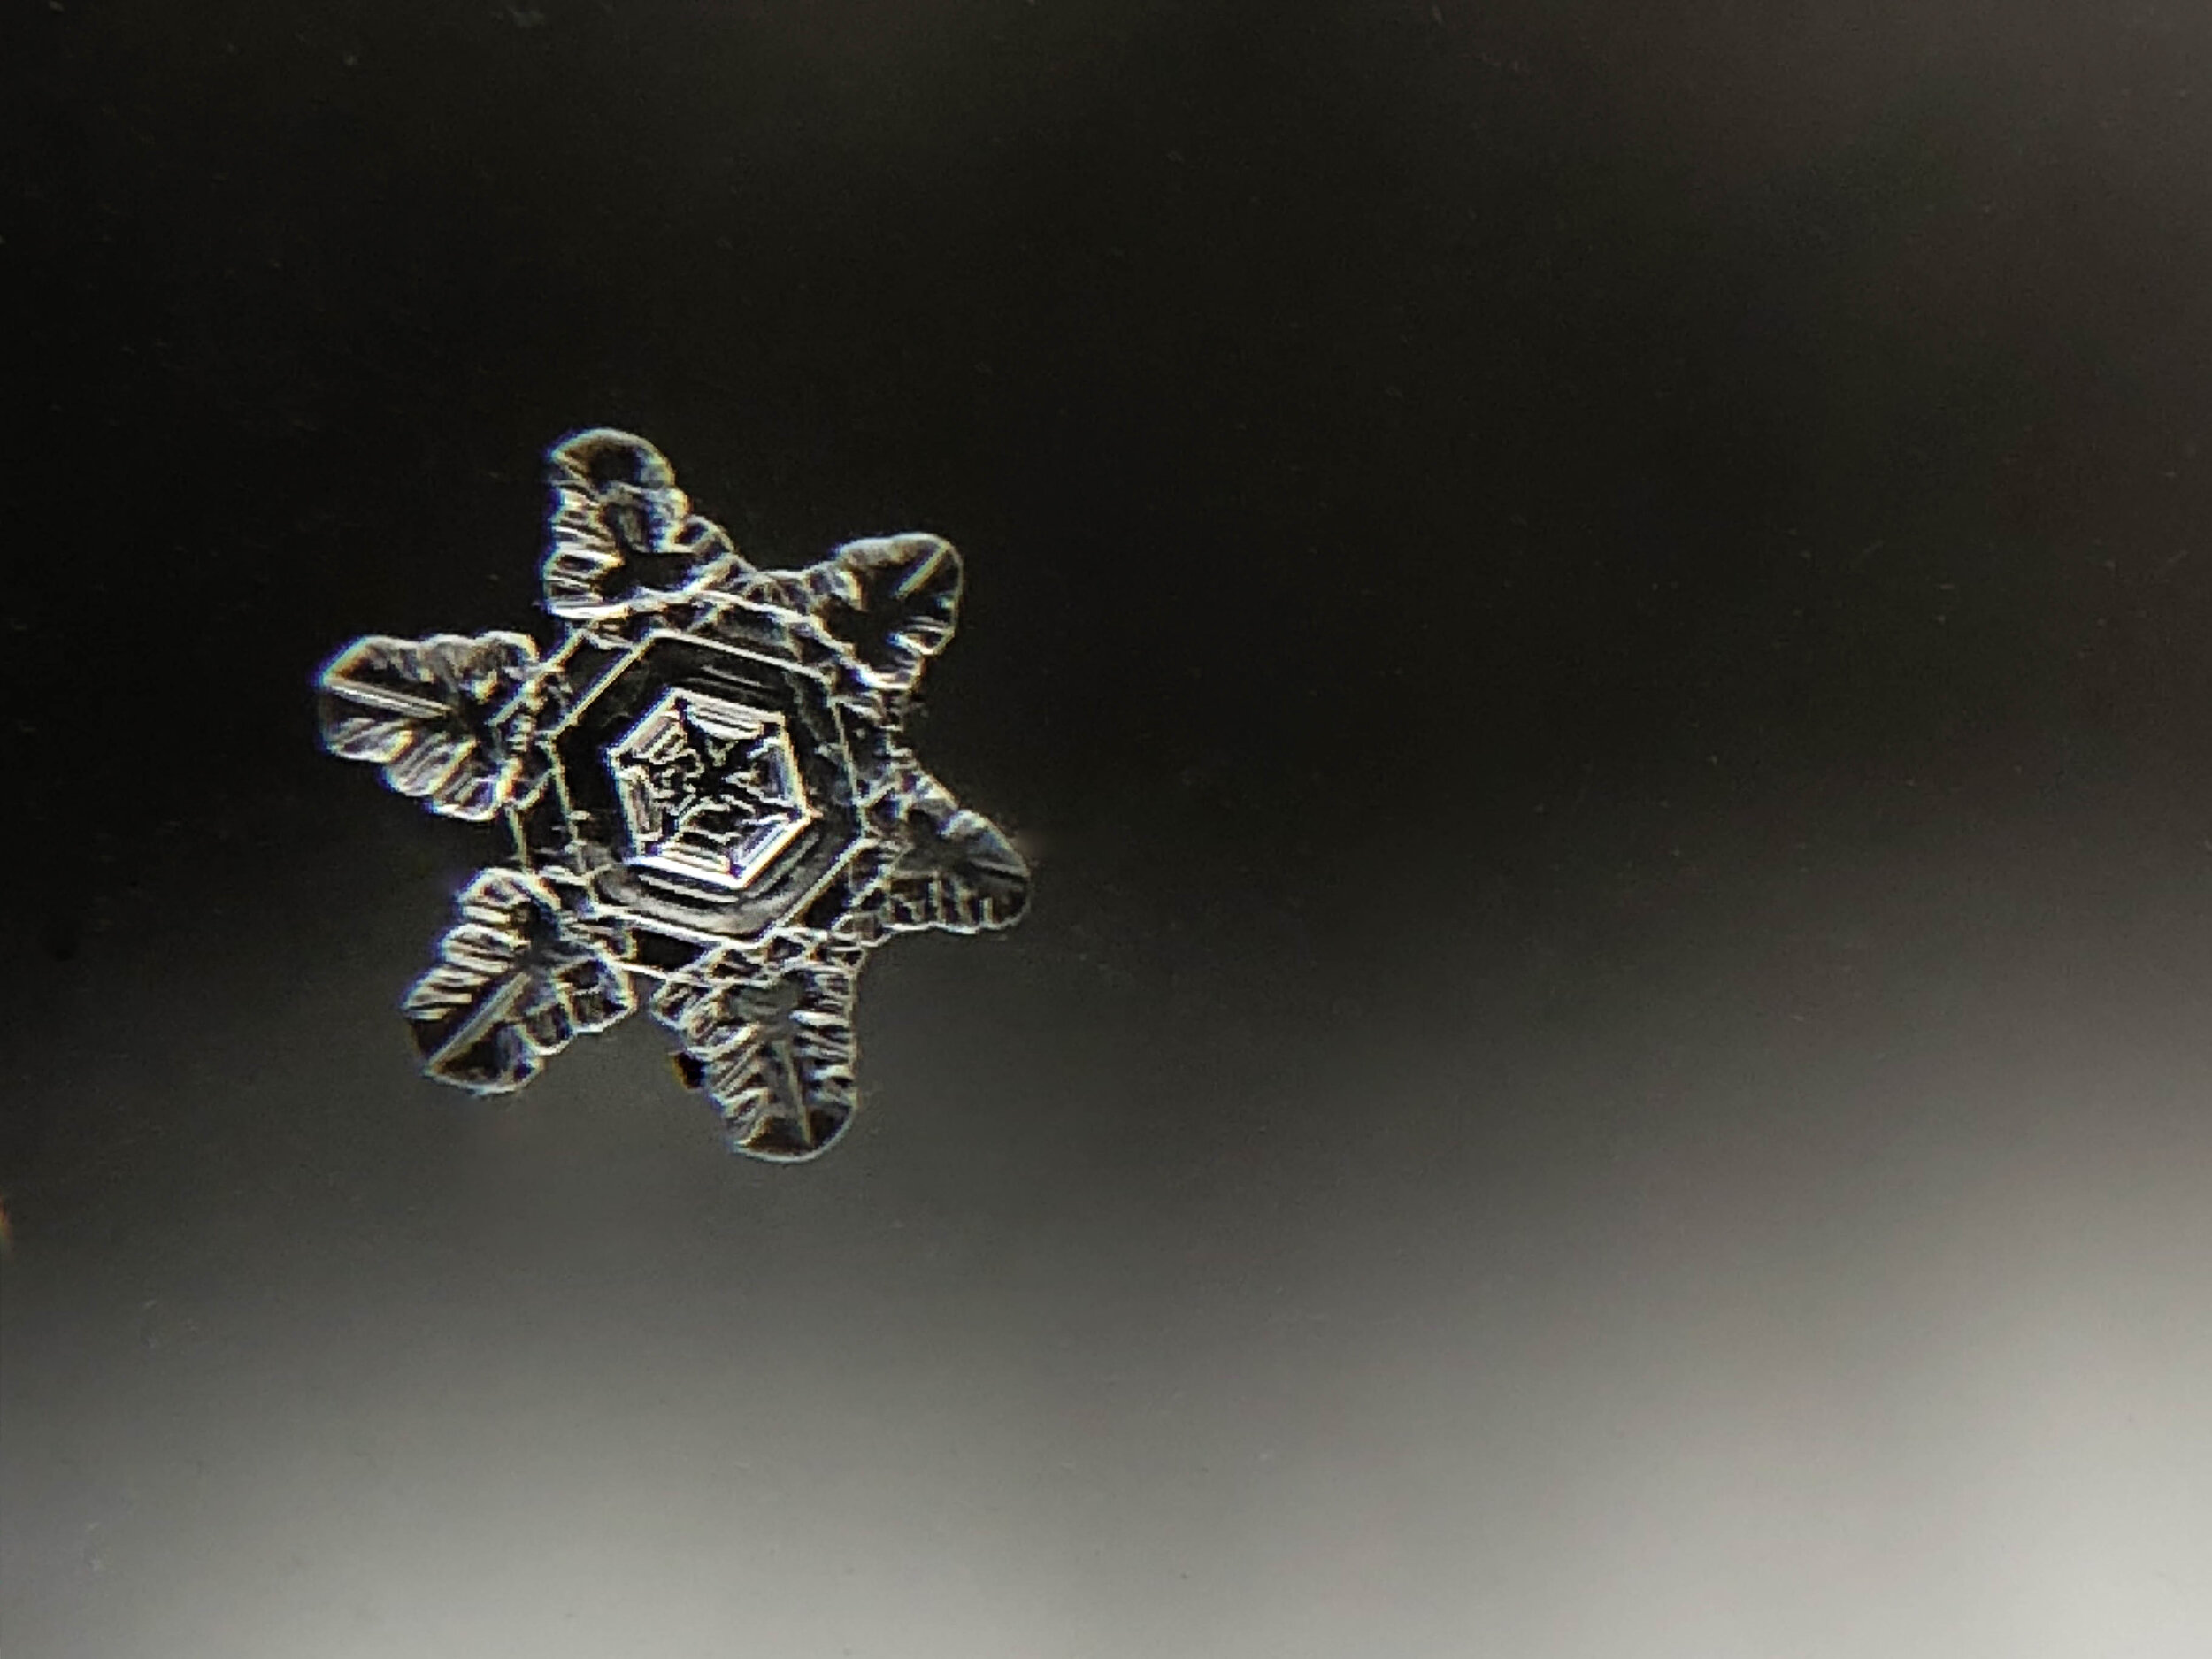
There are several different weather patterns that bring about different types of snow. There are sectored plates, stellar dendrites needles crystals, tsuzuni crystals, column crystals, hexagonal plates, and stellar crystals. I'd recommend you read more about them here, if you'd like more detail. It's amazing to see their differences and how the slight variation in temperature brings about so much change. I like to photograph them when temps are in the 20's and there's a big storm because the flakes seem to be larger and of the more commonly known variety.
Tip 2: Use a Dark Colored Background

Using a dark colored background helps the flakes to stand out more. I've tried a variegated scarf and the colors were interesting but I felt like it takes away form the intricacies of the snowflake a bit. Also, if the background has texture, like a wool mitten or a knit scarf, the fibers give the flake something to land against.
Tip 3: Look for Light
When the snowflakes land on one of their tips, propped up against a fiber from your backdrop, you have opportunity to move around it, looking at how the light effects it's sharpness and shape. Play with angles to see how the light and shadow bring out each angle in that snowflake.
Tip 4: Just One

Sometimes, in a big storm the snowflakes fall in groups. If that happens, use a tweezer or a toothpick to carefully separate them. But make sure which ever tool you choose, that it is at the outdoor temperature, otherwise you will melt your subject. ;) Same goes for your backdrop. I prefer the look of just one, but I'll leave that up to you.
Tip 5: Windows

snowflake photograph
